
Embroidery design: what it is, how it works, and why it influences embroidery quality.
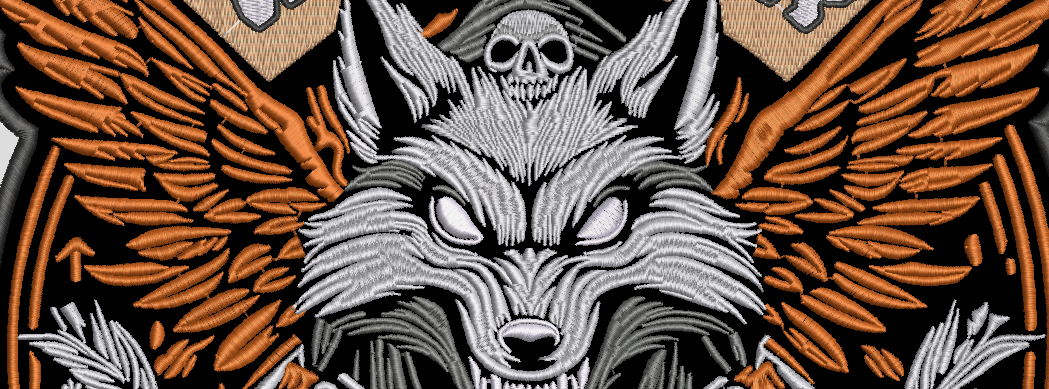
Have you received a quotation for embroidery and found an additional line described as an “embroidery digitizing fee”, “embroidery setup fee”, “punching” or “digitizing”?
It is natural to ask: what exactly is embroidery digitizing, and why do some companies charge for it?
Many people imagine that they can simply send a logo in PNG, JPEG, PDF or vector format to an embroidery machine and that the equipment will automatically take care of everything else. In reality, before a single stitch of thread reaches the fabric, there is invisible work involving interpretation, programming, testing and adaptation.
This work is known as embroidery digitizing. It is both a technical and an artistic stage, and it directly influences the definition of details, the stability of the fabric, the comfort of the garment, production time and the quality of the final result.
Embroidery digitizing is the process of creating a file in specialist software that tells the machine where, how and in which sequence to place the stitches. It is not simply a converted image: it contains decisions about stitch types, density, direction, underlay, overlaps, trims, color changes and adaptation to the fabric and final size.
At Bordados Custom, preparing the embroidery file is part of the production process. We do not charge a separate embroidery digitizing or setup fee. The technical work still exists and is included in our pricing structure, but the customer receives a clear price for the finished product, without an unexpected additional charge simply so that we can begin preparing the design.
1. Before digitizing: how does computerised embroidery work?
When we think about embroidery, it is natural to imagine someone working by hand with a needle and thread. That type of embroidery still exists and is a genuine art form. However, a large proportion of the embroidery currently used on clothing, uniforms, caps, patches, backpacks, towels and promotional products is produced through computerised embroidery.
The word “computerised” does not mean that the computer makes every decision on its own. It means that there is a digital file between the original design and the machine. That file transforms the logo, text or illustration into a sequence of instructions that the equipment can execute.
Without those instructions, the machine does not know which part to embroider first, where to position each stitch, when to change color, where to trim the thread or how to construct each area.
How does an embroidery machine move?
In simple terms, we can think of an embroidery machine as an automatic sewing machine combined with a highly precise hoop movement system.
The needle makes the vertical movement required to pass through the material. At the same time, the hoop moves the fabric along two axes:
- X axis: left and right;
- Y axis: forwards and backwards.
Each time the needle descends, the hoop has already placed the fabric in the position corresponding to the next stitch. By repeating this process hundreds or more than a thousand times per minute, depending on the equipment and the job, the machine builds letters, outlines, fills, textures and illustrations using thread.
The process appears automatic, but the machine only executes instructions. It does not assess whether a letter will remain legible, whether the density is excessive, whether the fabric will pucker or whether a particular sequence is efficient. Those decisions are made earlier, during digitizing.
An expensive machine does not automatically correct a poorly constructed embroidery file. The quality of the equipment matters, but the machine can only execute the instructions it receives.
2. What is an embroidery file?
A digitized embroidery file is a digital file created specifically to control an embroidery machine. It is the technical translation of a design into a language made up of stitches, movements and production commands.
We can compare it to a car’s GPS. The GPS does not drive the car, but it continually indicates the route that should be followed. In the same way, the embroidery file does not create the embroidery by itself: it tells the machine how to move the hoop and in which order to execute the work.
Unlike a PNG, JPEG, PDF or SVG, the embroidery file was not created merely to be viewed by people. It was prepared to be interpreted by embroidery software and machines.
It is not just the logo saved in another format. It is not a PDF and it is not simply a vector file. It is a technical construction that defines how the design will be reproduced with thread, within the limitations and possibilities of embroidery.
What can an embroidery file contain?
The information available depends on the type of file. An editable source file may contain, among other elements:
- object shapes and outlines;
- stitch types;
- density;
- stitch direction;
- pull compensation;
- underlay stitches;
- entry and exit points;
- object sequence;
- color changes;
- thread trims, jumps and stops;
- overlaps;
- patterns, textures and effects;
- dimensions and internal production references.
Files intended directly for the machine may primarily store the stitch sequence and the commands required to execute the job.
What are underlay stitches?
Underlay stitches are sewn before the main visible stitches. They can help stabilize the fabric, create a more even foundation, lift the stitches on textured or pile materials, improve coverage and control distortion.
There is no universal underlay. The correct choice depends on the design, the main stitch type, the thread, the material and the intended result.
What are tie-in and tie-off stitches?
At the beginning and end of certain objects, there may be short sequences of securing stitches, frequently called tie-in and tie-off. Their purpose is to help secure the thread and reduce the risk of the stitching beginning to unravel.
Are embroidery digitizing, setup, punching and programming the same thing?
In practice, several expressions are often used to describe the same service:
- embroidery digitizing;
- embroidery file creation;
- digitizing fee;
- embroidery setup;
- punching;
- embroidery programming;
- design digitization;
- embroidery digitizing.
The expression digital mockup may also appear during the process, but there is a useful distinction: the embroidery file is the technical production file; the mockup is the visual representation that allows the customer to preview the approximate final appearance.
Embroidery programs can produce highly realistic simulations of thread, texture, relief and stitch direction. However, a simulation is still a prediction. The real test takes place when the embroidery moves from the screen to the material.
An embroidery file should not be judged only by how it looks on a computer. It should be judged by how it stitches on the fabric.
3. Embroidery file, DST, PES, JEF, PNG and vector: what is the difference?
One of the greatest sources of confusion is treating all files as though they were equivalent. An image, a vector file, an editable embroidery source file and a machine stitch file all have different functions.
| File type | Main content | Use when creating the embroidery file | Final use |
|---|---|---|---|
| PNG/JPEG image | Pixels and visual information | Can be used as a basis for interpreting and reconstructing the design. Image quality and resolution affect how easy it is to work from. | Reference for creating the embroidery file |
| Vector file | Shapes, lines, curves and colors | An excellent graphic base because it allows outlines and proportions to be handled more accurately. It still requires embroidery digitizing. | Base for creating the embroidery file |
| Editable embroidery source file | Objects, parameters, colors, densities, underlays and effects | Allows the embroidery to be created, adjusted, resized and technically edited. | Development and editing of the embroidery file |
| Machine stitch file | Stitches and production commands | Has more limited editing capabilities and mainly contains the final stitching instructions. | Run the embroidery on the machine |
Both PNG or JPEG images and vector files can be used as a basis for creating a digitized embroidery file. The main difference is that a vector file usually makes it easier to reconstruct the design, but neither format contains the instructions required for the machine to embroider it.
Why can an embroidery machine not read a PNG or JPEG directly?
A PNG or JPEG contains visual information arranged as pixels. The machine, however, does not simply need to know that there is a blue area or a black line. It needs stitching instructions:
- where the first stitch begins;
- which direction it should travel;
- the length of each stitch;
- the sequence of the areas;
- when to change color;
- where to trim the thread;
- which underlay should be applied;
- how to compensate for movement in the fabric.
An image has pixel positions and coordinates, but those positions do not represent hoop movements or embroidery decisions. The image must be interpreted and reconstructed as embroidery objects and stitches.
Is a vector file enough?
A vector file in AI, EPS, SVG, PDF or CDR format is usually an excellent starting point. It makes the work easier because it may contain defined shapes, curves, outlines, separated colors and correct proportions.
However, a vector file is not an embroidery file. It does not automatically define density, stitch type, underlay, pull compensation, trims, sequence, thread direction or adaptation to the fabric.
A vector describes the geometry of the design. A digitized embroidery file describes how that geometry will be built with thread, stitch by stitch and in a functional production sequence.
Is an embroidery file the same as a DST file?
No. Embroidery file is a general term for the digitized design or the technical work from which it is created. DST is a widely compatible machine format used mainly to store stitches and production commands.
A DST can include stitch positions, movements, jumps, stops and color or needle changes. However, it does not preserve all the editable information from the original source file and does not necessarily store the actual thread references used. When opened in another program, the displayed colors may be assigned automatically.
What is the difference between DST, PES and JEF?
| Format | Common use | Notes |
|---|---|---|
| DST | Very common on industrial machines and recognized by many programs | High compatibility; limited editable information |
| PES | Brother ecosystem and compatible machines | Different versions exist to maintain compatibility between machines |
| JEF | Stitch format used by many Janome and Elna machines | Contains coordinates and stitch instructions for the machine |
Many other formats exist, including EXP, VP3, VIP, HUS, XXX, PCS, SEW and SHV. Compatibility always depends on the brand, model and software or machine version.
At Bordados Custom, we frequently use DST as a production format because of its compatibility. We also retain the editable source files and the internal production history needed for future changes and repeat orders.
4. How is a professional embroidery file created?
Creating the embroidery file begins before any stitches are generated. The design, final size, material, placement and purpose of the product must first be understood.
The professional analyses factors including:
- the original design and its essential elements;
- the intended final size;
- the thickness of lines and lettering;
- the level of detail;
- the number of colors;
- the fabric and structure of the product;
- the embroidery placement;
- the intended thread and needle;
- the machine and hoop;
- the desired visual and functional result.
Step 1 — Analyse and adapt the design
Not everything that works on a screen can be reproduced in exactly the same way with thread. It may be necessary to thicken lines, open up spaces, simplify elements, enlarge lettering, remove invisible details, adjust proportions or strengthen contrast.
The aim is not to change the identity of the design unnecessarily. It is to preserve what makes it recognisable after it moves from a flat image to a physical embroidered object.
Step 2 — Create the objects
An embroidery file is not normally drawn stitch by stitch. The digitizer creates shapes, lines and paths. The software generates stitches according to the parameters defined for each object.
For example, to create a filled square, there is no need to draw thousands of stitches manually. The area is defined, the fill type is selected and the parameters are adjusted. Automatic filling is only the starting point; the real work lies in the decisions that follow.
Step 3 — Choose the stitch types
The most common stitch types include:
- running stitch: used for lines, details and travel paths;
- satin stitch: often used for lettering, outlines and narrow elements;
- fill or tatami stitch: used for larger areas;
- programmed stitches and textures: used to create specific visual effects.
The choice depends on the width of the element, its direction, the fabric, the thread and the intended effect.
Step 4 — Organise the sequence
The order of the objects influences alignment, overlaps, stability, the number of trims, color changes, machine time and finishing.
A poorly organised sequence can create gaps between elements, increase unnecessary movement or cause certain areas to distort before the final outlines are applied.
Step 5 — Define the technical parameters
This is where the elements that distinguish a professional embroidery file from a basic conversion are adjusted.
Density
Density defines the distance between rows of stitches. Excessive density can make the embroidery stiff, distort the fabric, increase thread breakages, break needles and create build-ups of thread. Insufficient density can leave the background visible and reduce coverage.
Stitch direction
Direction changes the way light is reflected and can be used to create volume, visually separate areas of the same color, follow the shape of the design and improve stability.
Pull compensation
Thread places tension on the material. Certain areas may become narrower than intended. Pull compensation adds a calculated margin to counteract that effect.
Underlay
The foundation placed underneath the visible stitches can stabilise, lift or prepare the surface. Its type and intensity must be adapted to the material and the main stitch.
Entry, exit, trims and jumps
Where each object starts and finishes influences efficiency and the final appearance. A well-planned embroidery file reduces unnecessary movement, loose ends and subsequent manual finishing.
Overlaps
When two objects meet, one may need to extend underneath the other. This margin helps prevent gaps caused by movement in the fabric during production.
Step 6 — Review the stitch sequence
Once the software has generated the stitches, the professional checks for areas that are too dense, excessively long or short stitches, jumps, trims, overlaps, distortions, color changes and the overall efficiency of the job.
Step 7 — Test, correct and validate
A digital simulation is useful, but it does not replace the real behaviour of the thread and fabric. When the complexity of the design, the material or the application justifies it, we carry out physical tests before production.
After testing, densities, pull compensation, underlays, sequences, outlines, directions, dimensions and details may be corrected. Some embroidery files are right on the first attempt. Others require several versions before the intended result is achieved.
Send us the image and tell us the product, size and quantity you need. We assess whether the design is suitable, recommend any necessary adaptations and prepare the embroidery file as part of our process, without a separate digitizing fee.
Send your design via WhatsApp5. Can an image be converted into embroidery automatically?
Yes. Automatic and semi-automatic tools can analyse bitmap or vector images and generate embroidery objects. Some programs can convert shapes, reduce colors, create fills and suggest stitch directions.
However, the fact that this function exists does not mean that the result is automatically ready for production.
Automatic conversion can struggle to interpret:
- details that are too small;
- narrow lettering;
- overlapping elements;
- shadows and gradients;
- fine outlines;
- photographs;
- low-contrast areas;
- production sequences;
- the specific requirements of the fabric or product.
For simple jobs, automation can speed up part of the process. With complex designs, correcting the automatic conversion can take longer than creating the embroidery file from scratch.
Can artificial intelligence already create embroidery files?
Systems that use artificial intelligence or automatic analysis in certain stages of the process already exist. They may identify objects, reduce colors, interpret shapes and suggest stitch types or directions.
It would therefore be inaccurate to say that artificial intelligence cannot take part in the process. The genuinely important question is different:
Can it consistently create a complex, attractive and efficient embroidery file that is ready for production without professional review?
In our experience, not yet on a consistent basis. Many decisions still depend on the behaviour of the fabric, the thickness of the thread, knowledge of the machine, visual judgement, analysis of the test and the physical limitations of embroidery.
The most likely future is an increasingly semi-automatic process: software accelerates certain tasks, while a professional interprets, adapts, tests and validates the result.
Knowing how to use the software does not mean knowing how to create good embroidery files
Learning where the tools are located in a program is important, but it is not the same as understanding how embroidery behaves on fabric.
A person truly begins to master this field after following many real jobs and understanding the consequences of their decisions: threads breaking, fabrics puckering, insufficient pull compensation, lettering closing up, details disappearing or outlines no longer aligning.
Everything may look perfect on the computer. On the fabric, reality is more demanding.
6. What makes an embroidery file genuinely good?
The simplest answer is: a good embroidery file stitches well and produces an attractive, stable and repeatable result.
For the customer, this means receiving embroidery that:
- remains faithful to the original design;
- has legible lettering;
- has clean outlines;
- does not excessively distort the garment;
- does not create unwanted gaps;
- does not become unnecessarily stiff;
- preserves the important details;
- remains consistent from one unit to the next.
From a production perspective, a good embroidery file should also reduce unnecessary thread breaks, trims and jumps, avoid build-ups, control thread consumption, reduce machine time and make repeat production easier.
Efficiency and quality are not opposing objectives. The embroidery file should be as efficient as possible, but never at the expense of the final result.
Knowing every tool in a program does not guarantee good embroidery. It is necessary to understand proportion, balance, texture, contrast, detail and the behaviour of materials. Two people can use the same software and produce completely different results.
How long does embroidery digitizing take?
It depends mainly on complexity. A simple embroidery file may be prepared in a few minutes. A complex design can require several hours or even several days of creation, testing and alterations.
At Bordados Custom, an embroidery file takes an average of around three hours to prepare, although this average includes very different types of work. We have produced names in a few minutes, logos that took several hours and illustrations that required more than 15 or 20 hours of work.
Size is not always the main factor. A small design with fine lettering, numerous details and overlapping elements can be more difficult than a large image made from simple shapes.
How many stitches can an embroidery design contain?
There is no fixed number. The total depends on the size, filled area, density, stitch type, underlays, overlaps and level of detail.
| Example | Indicative stitch count |
|---|---|
| Small name | Fewer than 1,000 |
| Larger name | Around 1,500 to 2,000 |
| Simple logo | Approximately 8,000 to 15,000 |
| Detailed patch measuring around 10 cm | Approximately 15,000 to 45,000 |
| Large or highly complex embroidery | 100,000 to 200,000 or more |
These figures are only examples from our own production and are not universal rules. Two designs of the same size can have completely different stitch counts.
Excessive stitching can cause stiffness, distortion, thread breaks and unnecessary thread consumption. The aim is not to use the greatest possible number of stitches, but to construct the design in a balanced way.
Do more colors make an embroidery file more difficult?
Not always. A design can contain many colors but consist of large, simple shapes. Another design may use only one color but include very small lettering, complex outlines and numerous details.
Complexity depends more on the number of objects, the size of the elements, overlaps, alignment and the interpretation of the design. The number of colors affects production, but it does not determine the digitizing time on its own.
Can the same embroidery file be used at any size?
Not always. When the editable source file is available, dimensions can be changed and the stitches recalculated. Even then, adaptations may be required.
Enlarging a design may create opportunities to retain details that were previously too small. Reducing it may require elements to be removed, lines to be thickened, spaces to be opened, lettering to be simplified, stitch types to be changed and outlines to be reorganised.
Enlarging a DST file directly may simply spread out the existing stitches, reducing density and creating stitches that are too long. When reducing it, the stitches may become excessively close together and create a build-up of thread.
A good embroidery file is not one that can be enlarged indefinitely. It is one designed for the size at which it will be produced.
Can the same embroidery file be used on any fabric or product?
Not necessarily. The same design may require adjustments for a T-shirt, polo shirt, sweatshirt, cap, towel, backpack or patch.
An embroidery file prepared for a patch with a stable base may not perform in the same way on a lightweight T-shirt. A cap has a curvature, structure and production sequence that differ from those of a flat garment. A towel with a pile may require specific underlay and coverage.
The changes may involve density, underlay, pull compensation, direction, sequence, speed, stitch type and the minimum size of details.
Choosing the right product is also essential. To understand more about how garment quality, fabric weight and construction affect the result, read our guide to choosing suitable clothing for embroidery.
Can a poorly digitized design damage a garment?
Yes. An excessively dense or poorly sequenced embroidery file can contribute to puckering, stiffness, holes, distortion, thread breaks, needle breakage, stitch build-up and misalignment.
However, not every problem should be attributed to the embroidery file. The result also depends on the stabilizer, hooping, tension, needle, thread, speed, garment preparation, machine maintenance and the operator’s experience.
The embroidery file is a central part of the process, but it does not work in isolation. A good recipe does not guarantee a good meal if the ingredients, equipment or execution are unsuitable.
Why can two companies produce different results from the same logo?
Because there is no single way to interpret a design. Two professionals may make different decisions about simplification, direction, sequence, density, underlay, stitch types, overlaps, textures, outlines and details.
There may also be differences in the materials, thread, fabric, stabilizer, tension, needles, preparation and finishing.
For that reason, the brand or price of the machine alone is not enough to predict quality. The result depends on the people who digitize the design, operate the equipment and control production.
How should you choose an embroidery company?
The best approach is to examine the company’s portfolio, but not just isolated photographs of finished products. Whenever possible, look for comparisons between:
- the original design or logo;
- the adaptation that was made;
- the finished embroidery.
This comparison helps you assess fidelity, interpretation, legibility, preservation of details, cleanliness of outlines, balance and finishing.
It is also important to understand whether the company adapts the embroidery file to the product, advises the customer, proposes solutions for difficult designs, controls production internally and stores the work for future orders.
An embroidery may look attractive when viewed on its own and still be very different from the design that was requested. Comparing the original artwork with the finished product is one of the most useful ways to assess technical quality.
7. Why do some companies charge for embroidery digitizing?
Because creating a good embroidery file requires time, knowledge and experience. Some jobs are simple, but other designs require many hours of analysis, construction, testing and correction.
It is entirely legitimate for a company to charge for this service separately. A digitizing or setup fee normally covers the specialist time invested in preparing the file.
The price can vary considerably depending on the complexity, size, level of detail, product, the company’s commercial policy and the conditions associated with using or receiving the file.
Why does Bordados Custom not charge a separate fee?
Because we consider digitizing to be part of the process required to produce good embroidery.
When a customer sends us a logo, illustration or idea, our main objective is not to sell a technical file. It is to produce the best possible result on the finished product.
The time required to prepare the job still exists and is naturally reflected in our pricing structure, particularly for small orders. The difference is that we do not add a separate and unexpected design setup fee.
Creating the embroidery file still requires time, software, experience, testing and responsibility. We prefer to include that work in the price of the finished product and present the customer with a simpler, more transparent quotation.
What happens if the customer orders again?
We store the embroidery file and the associated production information. When a customer returns months or years later, we try to retrieve the file, dimensions, proportions, level of detail and the references required to maintain consistency.
If the work needs to be improved or adapted, we handle that process internally without adding a new separate digitizing fee.
What if the design needs to be changed?
Small changes, such as changing a color, correcting a letter, altering a name or adjusting one element, do not automatically result in a new digitizing fee.
When the design changes completely, it naturally becomes a new job. Even then, we maintain our policy of presenting a clear final price without a separate embroidery setup fee.
Is the embroidery file supplied to the customer?
Under Bordados Custom’s policy, an embroidery file created internally is a production tool and is not supplied automatically.
The logo, name or identity naturally remains the property of its respective owner. We do not use a private logo belonging to a company, association or group to produce work for other customers.
The technical file, however, was built for our materials, threads, needles, stabilizers, equipment and production methods. Once it leaves that context, we can no longer control the result.
This policy is not intended to lock the customer in. The customer is free to use another company, which can create a new embroidery file from the same logo. Our decision is intended to protect the technical responsibility attached to a file whose execution we can no longer control when it is used outside our process.
Why do we normally assess or recreate files supplied by other companies?
We frequently receive customers who already have a DST, PES or another embroidery file. We can analyse it, but we do not always know:
- which fabric it was created for;
- which size it was prepared for;
- which thread and needle were considered;
- which pull compensation and underlays were applied;
- whether it was tested;
- whether the file is genuinely editable;
- whether it meets our quality standard.
When necessary, we rebuild the work from the original design. The purpose is not to increase the price, but to ensure that we can take responsibility for the final result.
8. The biggest myths about embroidery digitizing
“Creating an embroidery file is just a matter of pressing a button.”
False. Software can automate certain tasks, but analysis, adaptation, sequencing, technical parameters, testing and corrections are still required.
“An attractive rendering means the embroidery file is good.”
False. The simulation is useful, but the decisive test takes place on the real material.
“The same embroidery file works at any size.”
Not always. Significant size changes may require simplification, additional detail or the reconstruction of objects.
“The same embroidery file works on every fabric.”
No. Different materials react differently to tension, density and underlay.
“More stitches mean better quality.”
No. Unnecessary stitches can worsen the result, increase stiffness and make production less efficient.
“The machine does everything by itself.”
No. The machine executes what the embroidery file, the operator and the product preparation allow it to execute.
9. Frequently asked questions about embroidery digitizing
What is embroidery digitizing?
It is the process of creating a technical file that transforms a design into stitch instructions, movements, sequences, color changes and functions that an embroidery machine can execute.
Are embroidery setup, punching and digitizing the same thing?
In most companies, these terms refer to the technical preparation of the embroidery file.
Can a PNG be sent directly to the machine?
Generally, no. A PNG can be used as a visual reference, but it does not contain the required stitching logic. It must be interpreted and converted into a digitized embroidery file.
Is a vector file ready for embroidery?
No. A vector file makes it easier to prepare the shapes, but it still does not contain densities, underlays, stitch types, sequencing, pull compensation or adaptation to the fabric.
Are an embroidery file and a DST the same thing?
No. Embroidery file is the general term. DST is a machine format that mainly stores stitches and production commands.
Does a DST store the correct colors?
It can indicate color changes, but it does not necessarily store the actual thread references. When the file is opened, the program may assign colors automatically.
Can a DST be edited?
It can be changed or reinterpreted by certain programs, but it does not provide the same flexibility as the source file with editable objects and parameters.
How long does embroidery digitizing take?
It can take anything from a few minutes to several hours or days. At Bordados Custom, the average is around three hours, although complex jobs can require more than 15 or 20 hours.
Do more stitches mean better quality?
No. The stitch count depends on the design. Excessive stitching can cause stiffness, distortion, thread breaks and waste.
Can the same embroidery file be used at any size?
Not always. Significant changes may require simplification, new details, density adjustments or the reconstruction of parts of the design.
Can the same embroidery file be used on a T-shirt and a cap?
Not always. The products have different structures and behaviours. A cap may require a specific construction and production sequence.
Can artificial intelligence already create embroidery files?
Automatic tools and systems that assist with parts of the process already exist. However, technical or complex jobs still normally require professional review, testing and correction.
Why do some companies charge a digitizing fee?
Because preparation can require many hours of specialist work. Each company defines its own commercial policy and the conditions associated with the file.
Does Bordados Custom charge a digitizing fee?
We do not charge a separate embroidery digitizing or setup fee. The customer receives a quotation for the finished product.
Is the embroidery file created by Bordados Custom supplied to the customer?
It is not supplied automatically. It is retained as an internal production tool, allowing us to control the process and maintain consistency in the result.
Will I have to pay for digitizing again if I place another order?
We do not charge a new separate fee. We try to retrieve the previous work and make any necessary adaptations when justified.
Can I send an embroidery file created by another company?
Yes, you can send it to us for assessment. Depending on the file, size and product, we may use it, adapt it or recreate the work to ensure that it meets our standards.
Conclusion: digitizing is the foundation of good embroidery
When we look at finished embroidery, we see only the final result. But before every logo, name or patch, there is invisible work involving analysis, interpretation, construction, testing and refinement.
The machine is an essential tool, but it does not create quality by itself. The embroidery file transforms a static image into a sequence of thousands of coordinated movements. The fabric, thread, needle, stabilizer, hoop and execution complete the process.
For that reason, when comparing embroidery companies, do not look only at the number or brand of machines. Examine the portfolio, compare original designs with finished results and look for a company that controls the process from technical preparation through to final finishing.
At Bordados Custom, we create the embroidery files internally and produce the embroidery ourselves, allowing us to follow every job from the file sent by the customer through to the finished product. We work with no minimum order quantity and without a separate digitizing fee.
For patch projects, you can also view our custom embroidered patches. When a design contains photographs, gradients or details that cannot be reproduced entirely with thread, our custom printed patches may be a suitable alternative.
Send us your logo, name or illustration. The Bordados Custom team will assess the file, recommend the most suitable size and product, and prepare the embroidery file as part of the production process, with no minimum order quantity and no separate digitizing fee.
Request an assessment via WhatsAppAn embroidery file does not exist to impress on a computer screen. It exists to bring your embroidery to life.